
Disclosure: Aussie Hosting is community run. We sometimes earn a commission when you buy hosting through our links. Learn more.
How to Migrate from HTTP to HTTPS on WordPress
 Nathan Finch——Last Updated on March 10, 2025
![]()
![]()
![]()
![]()
![]()
![]() Total: 2.2K
Total: 2.2K
 Back in February 2018, Google announced that its Chrome browser would begin marking all non-HTTPS websites as "Not Secure" to encourage web encryption.
Today, 63.7% of all websites use HTTPS, the secure version of the HTTP protocol. The question is: Do you really need to migrate from HTTP to HTTPS in 2025?
While there may not be anything wrong with your HTTP website, some visitors may be confused by the "Not Secure" warning, causing them to leave your site in a matter of seconds. This is something that you should avoid at all costs, which is exactly why we recommend moving from HTTP to HTTPS as soon as possible.
In today's guide, we are going to explain how to migrate from HTTP to HTTPS on WordPress using an easy-to-use plugin fittingly named Really Simple SSL. We will also be sharing some top tips to make the transition from HTTP to HTTPS as simple as possible.
Why Should You Move Your WordPress Site to HTTPS?
There are several reasons why WordPress site owners should migrate from HTTP to HTTPS as soon as possible.
Security
 One of the main reasons to migrate to HTTPS is the extra layer of security that HTTP lacks.
By simply moving from HTTP to HTTPS, your WordPress website will be secured via Secure Socket Layer (SSL)/Transport Layer Security (TLS) protocol which helps prevent data from being corrupted or modified.
If you happen to run an eCommerce business or a blog that processes personal data such as credit card information and passwords, HTTPS is necessary.
Trust and Credibility
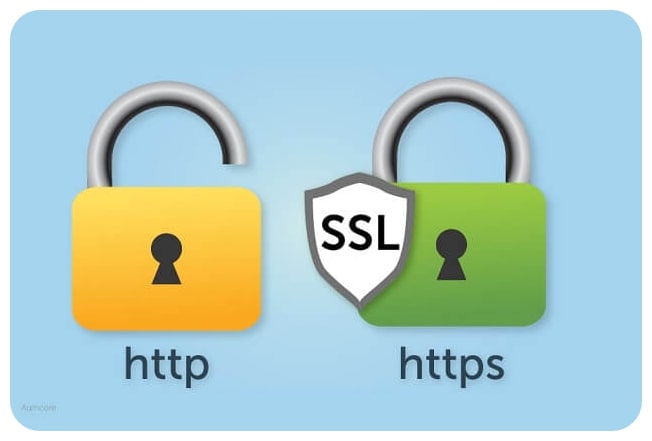
When browsing the web, users tend to look for the padlock icon in the address bar used to indicate that the data being transferred between the web server and the browser is encrypted. As soon as someone sees the lock icon on your website, they will inevitably feel at ease knowing that their data is secure and the website is authentic.
Chrome Warnings
Since 2018, Google Chrome began marking all non-HTTPS websites as "Not Secure" to promote web encryption. Today, every time a user attempts to enter a non-HTTPS site, they will encounter a privacy error page stating that their connection is not private and attacks may try to steal their information.
While a visitor can still enter your website by ignoring the message, many users will swiftly click off your site to prevent their passwords or credit card information from being stolen.
Given that Chrome currently holds over 65.89% of the browser market share worldwide, you should consider migrating from HTTP to HTTPS if you want to increase website traffic.
Performance: Faster Loading Times
 While HTTPS is generally slower than HTTP, WordPress websites that use HTTPS can be faster than those that use HTTP. Site speed is an extremely important factor that should never be overlooked when building and launching a website.
If a visitor has to wait longer than they should for your website to load, they will simply look for what they need elsewhere.
That being said, it is important to note that several factors affect site speeds, including your web host, plugins and the theme you are using on WordPress.
Benefits for SEO
According to a 2014 blog post by Google, HTTPS is now officially a ranking factor. Although it isn't a major ranking factor, migrating from HTTP to HTTPS can increase your ranking going forward, allowing you to beat the competition in the long run.
How to Move Your WordPress Site From HTTP to HTTPS
Now that you understand the advantages of moving from HTTP to HTTPS, it’s time to learn how to migrate from HTTP to HTTPS on WordPress.
Related: WordPress.org vs. WordPress.com
Choose an SSL Certificate for WordPress
 In order to migrate to HTTPS from HTTP, you will require an SSL certificate used to encrypt data. If you don't already have one, we recommend buying one from a trustworthy provider such as GoDaddy, NameCheap or GeoTrust.
You can also obtain a free SSL/TLS certificate from Let's Encrypt, though we generally recommend purchasing an SSL certificate for your website.
When looking for an SSL certificate, you will often come across three categories:

 Domain Validation (DV) Certificate: SSL certificate that comes with 128- or 256-bit encryption.
- Organization Validation (OV) Certificate: Human verification for extra security.
- Extended Validation (EV) Certificate: A trustworthy, single-domain or subdomain that requires the owner of the website to pass a globally standardized identity verification process.
Add Your SSL Certificate to Your Site
Now that you have purchased an SSL certificate from a trustworthy provider, it's time to install it on your WordPress website. If you're using a free Let's Encrypt SSL certificate with SiteGround, all you need to do is click on the "Install" button in the cPanel.
If you're using a different host, we highly recommend contacting customer support or reading through their knowledge base for more information on how to install your SSL certificate.
Once you have installed your SSL certificate, it's time to activate it by going to your website. To check if the certificate was successfully installed, click on the information icon in the address bar. Google will let you know if the SSL certificate is active by stating that your connection to the site is now private.
If you were not successful, you will encounter a page letting you know that your connection is not private.
Install and Configure the Really Simple SSL Plugin
If Google displays a message stating that your connection is private but someone on the network may be able to change the look of the page, you'll need to go ahead and change the URL of all the images and media on your site from http:// to the new https:// URL.
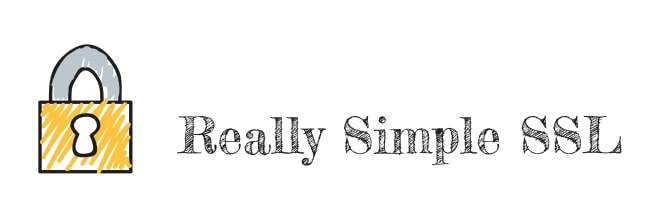
While you could spend hours figuring out how to do this manually, we highly recommend installing the Really Simple SSL plugin that handles everything for you.
Not only does the plugin update the URL for your WordPress site to HTTPS, but it also adds a 301 redirect to send traffic to the new HTTPS version of your website.
To do this, all you need to do is install and activate the Really Simple SSL plugin. Once installed, click on the "Go ahead, activate SSL" button. Next, head to General Settings and ensure that your WordPress Address and Site Address starts with https://, rather than http://.
To ensure that all of the settings were updated properly, head to Settings > SSL. If everything is working as it should, you will see four green checkmarks on the Detected setup page.
Check If the Migration Was Successful
To check if the migration was a success, you must verify a few things:
- Make sure it automatically redirects you to the secure HTTPS version of your website
- Next, make sure that the green padlock icon is visible on all of the pages on your website
Make Sure Your WordPress Site Is HTTPS-Ready: Next Steps
Once your WordPress website is secure, it's time to ensure that it is entirely HTTP-ready.
Update All of Your Links
If you have linked your WordPress website to all of your social media pages or other external sites, you should update all of the HTTP links to the HTTPS version. While the Really Simple SSL plugin automatically redirects traffic to the HTTPS version of your site, it's best to avoid the need for redirects.
Update Your URL in Google Analytics
To keep everything accurate, it is vital that you change your URL from HTTP to HTTPS in Google Analytics. If you don't know how to do that, simply go to Admin > Property Settings.
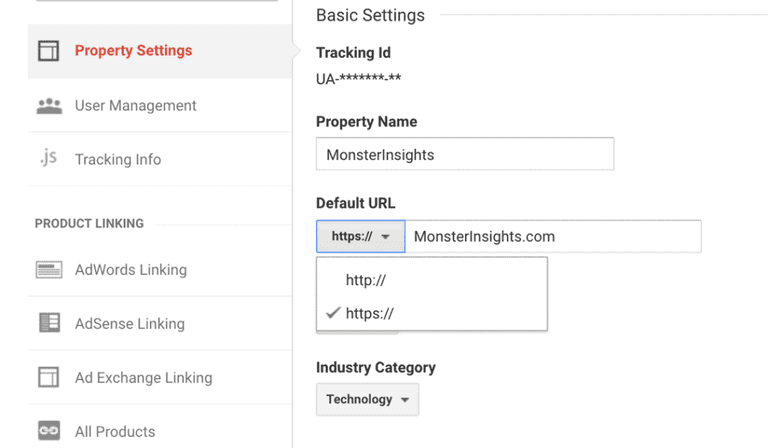
Next, change the Default URL from http:// to https:// in the dropdown menu.
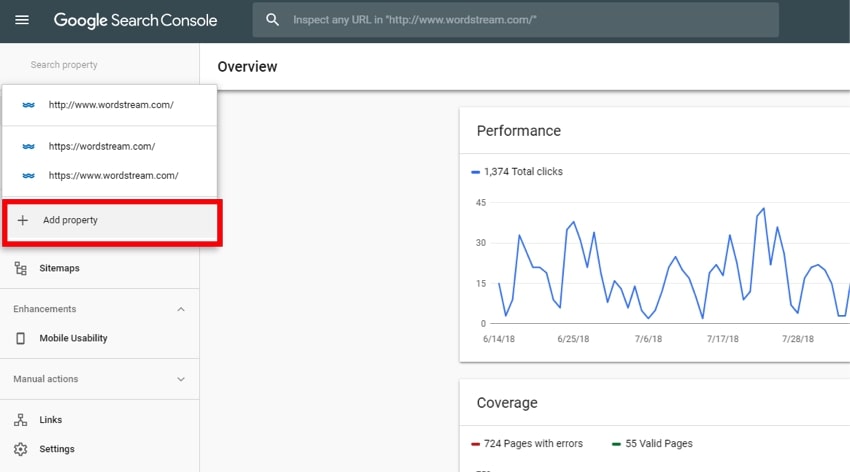
Add a New Property in Google Search Console
If you use Google Search Console to measure your site's traffic and performance, you're going to need to add a new property to your account. To do this, simply head over to the Google Search Console site and click on the red "ADD A PROPERTY" button.
It is also a good idea to add a new sitemap for the HTTPS version of your website so that everything is up to date.
Update CDN URL to HTTPS
If you're using a Content Delivery Network (CDN) for WordPress, you should update your URL there as well. And if you are ever in need for a refresher course check out our guide on what is URL.
Given that every CDN is different, we cannot give you specific advice on how to update your WordPress CDURL to HTTPS. Instead, you will have to either contact customer support or check out the knowledgebase for information on how to do this.
HTTP vs HTTPS: What's the Difference?
Now that you understand how to migrate from HTTP to HTTPS, it's time to take a look at the key differences between the two. But before we dive into the differences, it's important that you know what HTTP and HTTPS are in the first place to understand the importance of migrating from one to the other.
What Is HTTP?
Hypertext Transfer Protocol (HTTP) is a TCP/IP based communication protocol that allows your web application or browser to securely connect with a site on the World Wide Web. HTTP does this by transferring data from a web server to your browser so that you can view pages on the web.
While HTTP was used for all new websites in the 1990s, the World Wide Web is progressively switching to the secure version of HTTP known as HTTPS.
What Is HTTPS?
Hypertext Transfer Protocol Secure (HTTP) is the secure version of the Hypertext Transfer Protocol that uses the Secure Socket Layer/Transport Layer Security protocol for authentication and encryption. As with HTTP, HTTPS is used for securing the communication between the web server and the browser.
HTTP vs HTTPS: Key Differences
- HTTP is not encrypted, whereas HTTPS is HTTP with encryption.
- HTTP is an application layer protocol, while HTTPS uses an encryption protocol - Transport Layer Security
- HTTP uses port 80, while HTTPS uses port 443.
- HTTP does not require SSL, whereas HTTPS requires an SSL certificate.
What Is SSL/TLS?
Secure Sockets Layer, or SSL, is the standard technology used to keep an internet connection secure by making any data transferred between two systems impossible to read. Given that it uses encryption algorithms to make data unreadable, SSL is known for safeguarding sensitive data sent between a server and a client.
In 1999, SSL was renamed to TLS (Transport Layer Security) which still creates some confusion to this day.