
How to Customize WordPress
 Nathan Finch——Last Updated on March 10, 2025
![]()
![]()
![]()
![]()
![]()
![]()
 WordPress is the dominant website platform around, and for good reason. It’s easy to use, incredibly customizable, and is included with most quality web hosting providers.
Let's dive into how you can customize your WordPress sites after getting your hosting space squared away. Furthermore, if you haven't gotten your domain/host yet, check out our guide on WordPress .org vs. .com.
Settings First
As soon as WordPress has been installed and you want to start customizing it for your needs, it’s good to begin with the basics. Customizing your settings and controls will give you greater precision over the adjustments you make and allow you to customize the rest of the site to your liking.
Your initial WordPress page will have “Welcome” and a “customize your site” button. Ignore that; instead, click on the “screen options” tab at the top right-hand corner of the screen.
This place brings up a collection of checkboxes that show you what you see on your screen at any time. You can uncheck these as necessary if you don’t care about some of them.
Next, you can drag-and-drop the boxes you do want to keep around your screen based on your preference or how often you think you’ll be using the boxes.
For instance, Quick Draft might be a good choice if you find yourself frequently coming up with notes or rough drafts for blog posts. On the other hand, most people won’t be interested in WordPress Events and News unless you’re a developer.
After this, head over to the WordPress settings button, which is located on the left-hand menu. These should be set up well enough for most users right off the bat, but it helps to go through and make sure that everything is in great condition.
This is also the place in which you'll customize several major aspects of your site, like your Title.
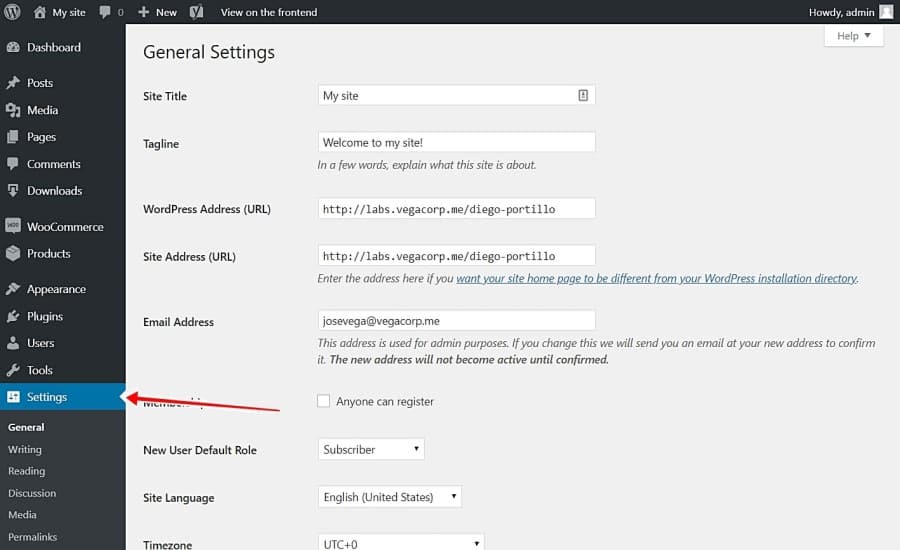
It's also a good idea to double-check that the site address and WordPress address match each other; you don’t want visitors getting lost on their way to your site!
Here, you can also make it so that your homepage is what’s displayed initially, rather than your blog feed (which is the default).
We’d also recommend setting the “For each post in a feed, include…” option to “Summary”. This causes your posts to be summarized, which helps people scroll through your content faster and helps your page load more quickly.
Additionally, make sure that your “search engine visibility” is unchecked so Google can find your site for traffic purposes.
Beyond these basics, there are plenty of other settings you can mess around with through this page. We’d recommend checking out your privacy settings, as it allows you to pick up a privacy page automatically created by WordPress. This is invaluable if you plan on having international traffic in light of the GDPR.
Users – Adding and Removing
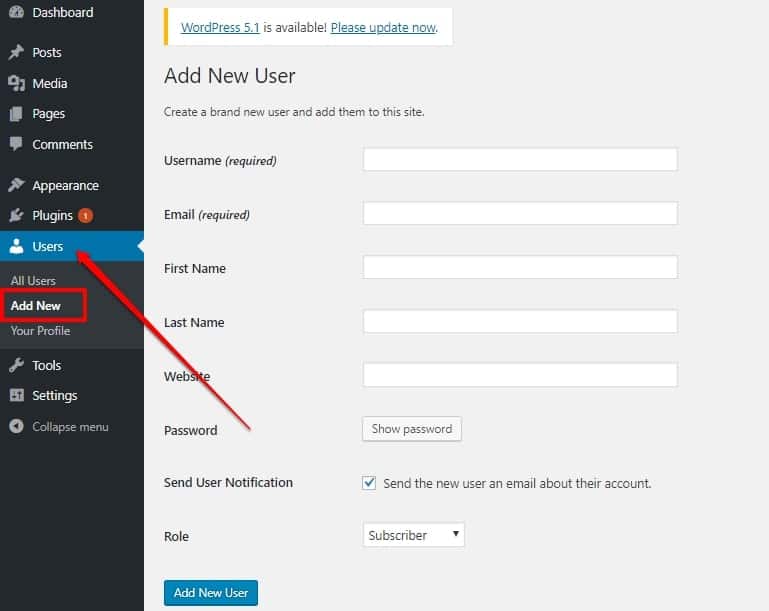
Let’s next head to the Users menu, which should be on the same left-hand console. Here, you can create new user profiles or edit the user profiles of anyone currently in the system. This lets you determine who has certain privileges and login information.
The buttons are fairly self-explanatory. “Add New User” allows you to add a new user to the site and requires that you fill out certain information about them, including a username and email address. You can customize their role and give them certain privileges using the “role” control at the bottom.
You can also edit user profiles and adjust privileges or administrative controls if you decide to bring more people into the site for content creation or editing purposes. Take care when using this menu if you’re bringing someone in so that you don’t accidentally give them full administrator privileges unless you trust them 100%.
Finally, this part of the site allows you to change your password and you can even use WordPress to generate strong passwords if you want some assistance. Given WordPress’s occasional issues with security, it’s a great idea to use this control switch up your password a few times a year.
Theme Things
Now it’s time to get into the fun part of WordPress customization: themes!
Depending on the hosting package or WordPress plan you’ve chosen, you’ll have access to either several dozen or several thousand themes. This plethora of creative opportunities can be a bit overwhelming.
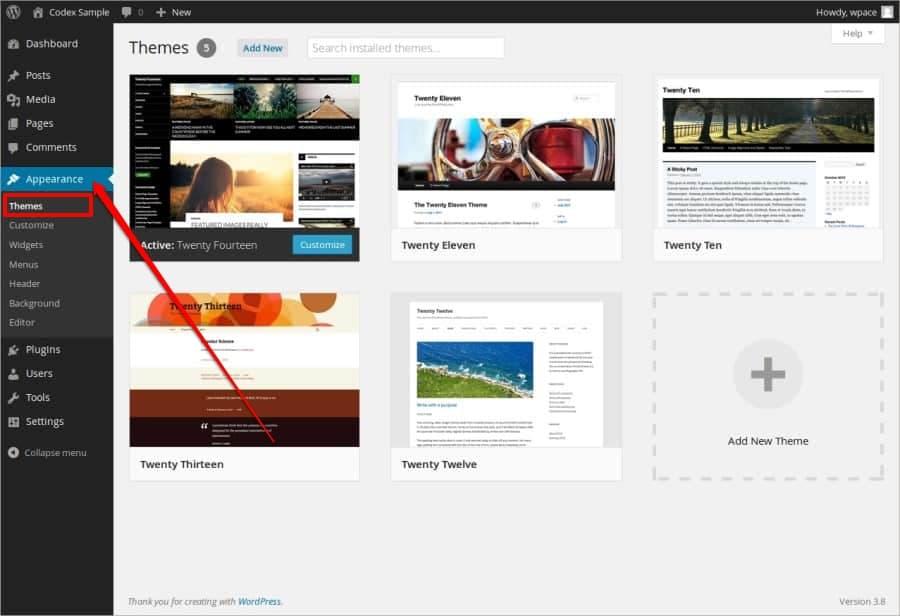
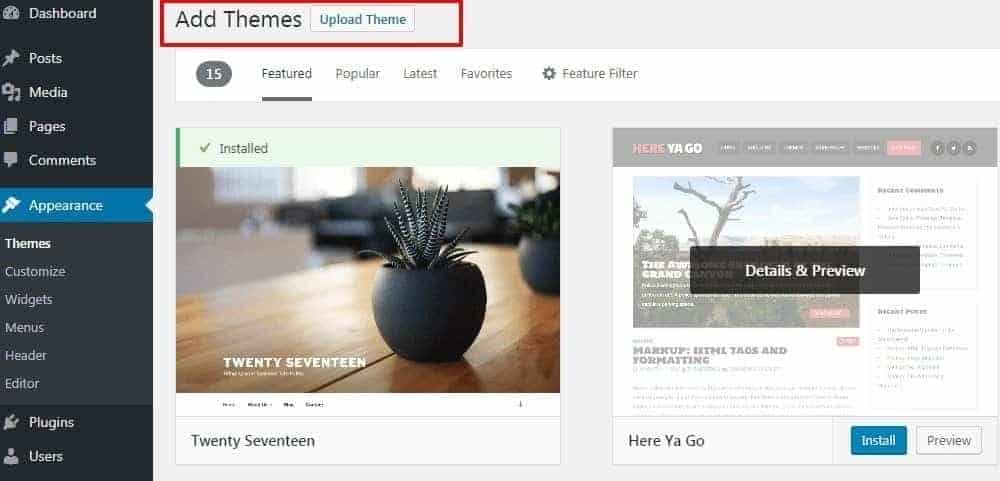
You can modify or select a theme by going to “Appearance” on the left-hand side of your dashboard. WordPress automatically installs themes on your system, but you can use this menu to search for new themes by clicking “add new theme”.
Any free themes you already have should be in your collection already. Themes from third-party providers can be found in your account by clicking on your “downloads” tab.
Otherwise, you can use the tabs at the top of the screen to either search for themes manually or select them from collections like “Popular”, “Latest”, or “Favorites”.
Once you’ve found a theme you like, you can download the files and return to WordPress. After adding your theme, you can “Upload Theme” using the button at the top of the screen.
A file uploader box should pop up, allowing you to drop your WordPress files into the space. WordPress automatically installs and activates the theme at this point.
Next, click “Customize” under “Appearance”; this will give you the ability to customize your theme to your liking. The tool’s controls and appearance will look slightly different based on what each theme allows you to do, but the general layout is identical.
WordPress customization options are on the left-hand side of the screen and the preview is directly in the center.
Your Site Identity is the title of the site, and appear if you don’t have a logo in place. Site Icon isn’t the logo, though; this is the small icon that shows up in the browser tab (i.e. the “G” for Google).
Logo, instead, is found under “Header”. You can select your logo from a device or computer, though make sure that its background is transparent so it shows up no matter what background color you choose.
Speaking of color, you can change the universal shades available to your theme and website by clicking on the corresponding button on the left dashboard. Background color is self-explanatory; header and footer background color allows you to distinguish different sectors of your website page.
The “Global” button lets you customize global settings according to your brand or predetermined theme. These include things like the sizes of fonts or the layouts of various pages. It might help to give all of these settings a look even if you decide to keep them essentially the same based on what the theme provides by default.
Finally, if you purchased a WordPress premium theme, you may have additional customization options on the left and dashboard. These can be found on a button named after the theme itself.
For instance, “Astra” options will appear while named the same, though they may be under Appearance instead of on the dashboard as their own category.
These allow you to install additional plugins or alter aspects specific to those themes. We recommend spending a little bit of time experimenting with all your options, as this is easily one of the most in-depth aspects of the WordPress customization experience.
Plugins and SEO
Plugins are excellent additions to any website and can improve its functionality, performance, and features for your visitors. At the same time, you want to pick and choose your plugins carefully so you don’t accidentally overload your site’s bandwidth or storage limits, or make your site load too slowly for your visitors.
There are several “have-to-have” plugin types we’d recommend. These include plugins for security, like Wordfence, which protects your site from brute force attacks and malware.
You’ll also want some plugins for Image optimization if you plan on using a lot of visual media on your site. Smush is a good option, as it lets you use high-resolution images without slowing things down too much.
You’ll also probably want to get back up plugin, even if your hosting provider includes free backups as a perk. Backups let you keep your data stored elsewhere in case something crashes or something catastrophic happens to your site’s live version.
Caching plugins can also be useful. These let your WordPress site feel more responsive by delivering your website and data to your visitors a little more efficiently and quickly. W3 Total Cache is a great example.
Once you have identified the plugins you want to install (whether they’re the ones above or separate ones), you can install and activate them by going to the “Plugins” button on the left and dashboard and clicking “Add New”.
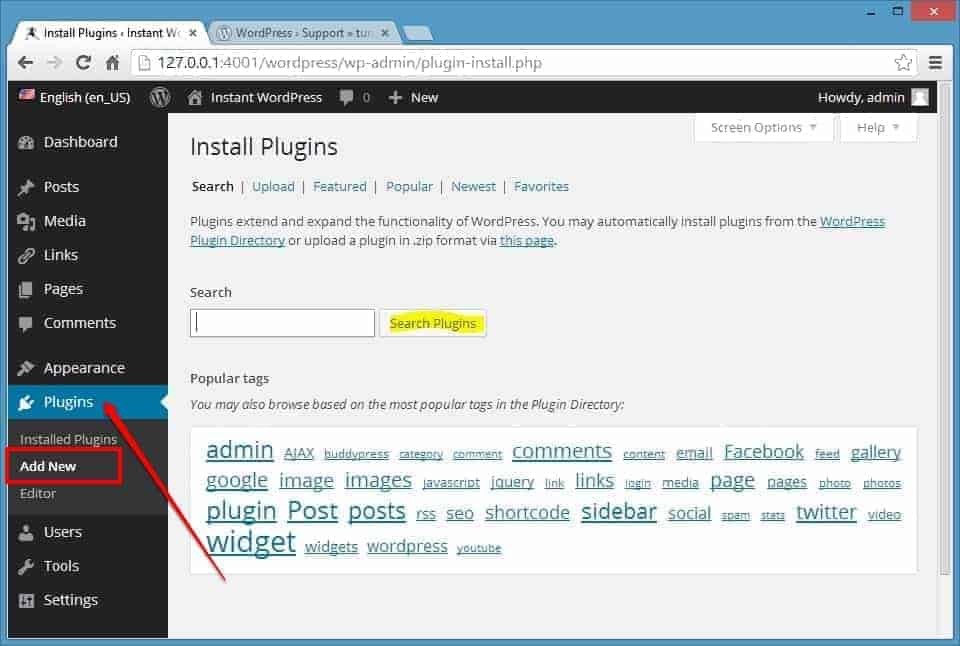
This screen also takes you to the free WordPress plugin collection. You can search for free plugins by typing the name in the search box at the top right side.
Once you’ve found the plugins you want, click “Install Now” and the plugin will automatically be installed. Click “Activate” once this is done to initiate its effects on your site. Repeat as many times as you need, but remember to keep your total plugin limit as low as possible to facilitate better site resource usage.
Premium plugins work the exact same way, although you’ll need to purchase and download the plugin files to your computer before uploading them at the “Add Plugin” page mentioned above.
Configuration
You can then customize individual settings and features of various plugins once they’ve been installed your WordPress site. In fact, most plugins will offer to give you a tour of their features upon installation, so we’d recommend that you take the time to check out each plugin if you haven’t used them before.
Alternatively, you can look at your dashboard on the left-hand side and see new menus for each plugin you’ve installed.
This allows you to manually change the features whenever you need. However, note that some plugins are hidden beneath various generic names, like “Performance” for W3 Total Cache. You may also need to find various plugins hidden under higher-level menus.
SEO Stuff
The second half to this step is focusing on your search engine optimization efforts. Optimizing your website to rank highly in Google and gather visitor traffic is its own article, so let’s dive into how to take care of this for me WordPress customization perspective alone.
Use the plugin tutorial above to find Yoast SEO; it’s the most well-used SEO plugin available for WordPress users. It allows you to gather keyword data and use that to optimize your content and SEO practices.
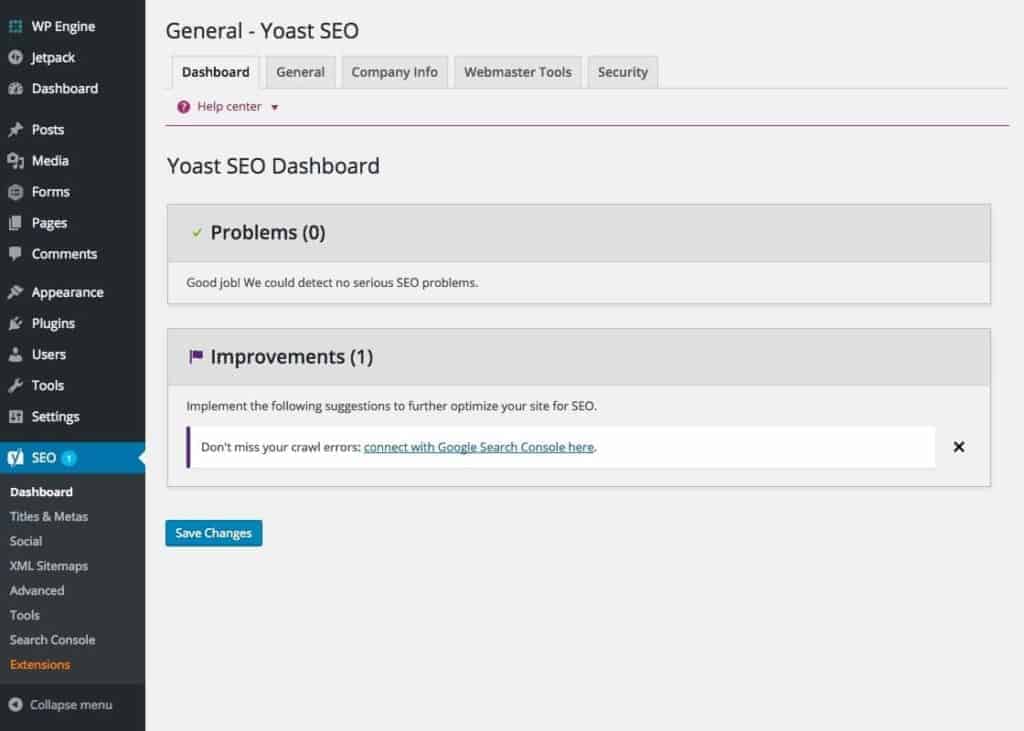
Once it’s installed and activated, locate its menu on the sidebar dashboard. It should look like a stylized “Y” with “SEO” next to it.
Here, you can access the Yoast dashboard by itself. Use the configuration wizard that pops up upon accessing this page to get everything running in use the provided links to begin your SEO optimization. The plugin will ask you a number of questions.
Firstly, make sure to select that your “site is live and ready to be indexed” when prompted. This ensures that Google will readily index your website once your content is crafted and posted.
Further questions will have you answer the kind of website you are building, as well as fill out critical information like your URL, any associated URLs with your brand or company, and finally whether your pages, posts, and templates should all show up in search results. Make sure that these are set to “Yes” for the best results.
Additional settings are available like specifying whether there is one author or a single author for various posts on your blog, and several title settings.
Contact Information
Let’s build a contact page next before we dive into the second biggest piece of your WordPress site customization: content building.
This can be done by clicking on a pre-made “Contact” page that comes with virtually every WordPress theme, including many of the free themes. You should fill this page with the least your basic information and include several links to relevant information as necessary, including your privacy policy page.
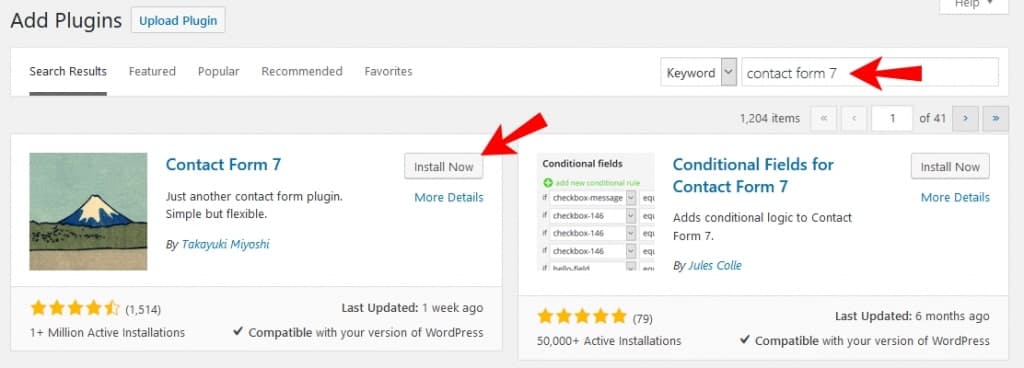
You can also use the Contact Form 7 plugin to create a special contact form, which allows you to link the form to your contact page. It gives people a streamlined way to send you a comment or complaint, which is much easier than sifting through all the comments you may have on your various posts.
You can use this plugin to send prewritten messages to the user sending the message, as well.
Ultimately, having your contact page up and running and having an associated contact form is a great way to make sure your visitors feel heard and ensure that you can communicate with them in the event of a technical difficulty.
This is especially critical if you run an online store and need to handle things like refunds from time to time.
Content Creation
Your WordPress site already has a few basic pages set up and easily accessible from the left-hand dashboard. These are called things like “Home”, “About” and so on.
You can and should fill these pages out first and foremost, both to get a handle on the WordPress interface if you haven’t used it before and to make sure they aren’t empty compared to your other content pages.
But when the time comes to create a new page, you can do that by clicking “Pages” on the left-hand dashboard, then "Add New". WordPress will take you to a screen where you can create a sample page, privacy page, or a new page altogether. Most people end up deleting the sample page, FYI.

Once you’ve decided to create a new page, you’ll be taken to the WordPress blog editor, which includes the preview on the left hand and center portions of the screen and various settings on the right-hand side. A page builder plugin will change this template.
You can name the page where you like and add a permalink as necessary. Then you can create the design and layout by using the block or exploring the template options via the right-hand controls. You can also fill the majority of the page with content that you write directly into the WordPress block, or on Word via copy/paste.
Related: How to Become a Web Designer
Remember to use the “save draft” button fairly frequently so you don’t accidentally erase your content.
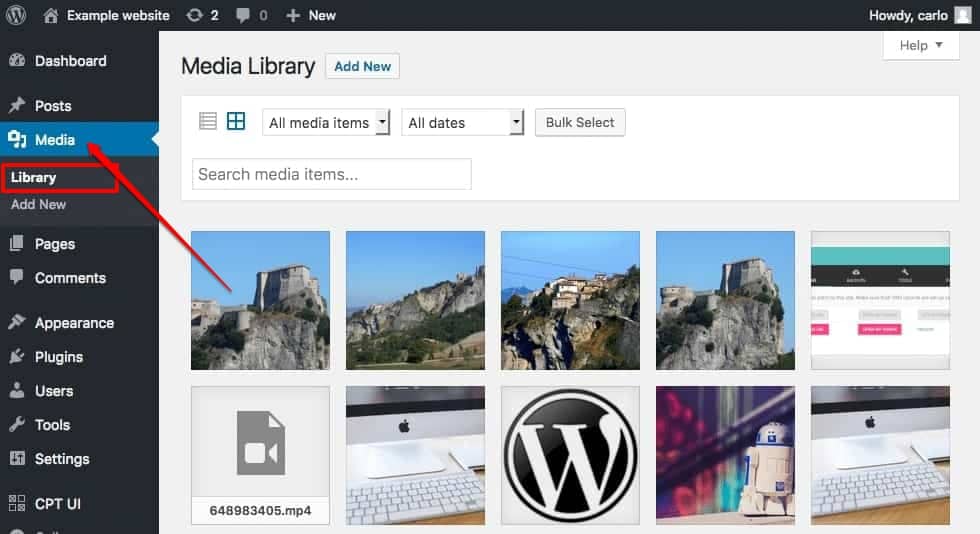
Most templates or plugins will also incorporate an “Add Media” button or something similar. You can use this to insert pictures or video into the content; this is usually added via a separate device or your computer.
Additionally, many page builder plugins allow you to add new blocks to the page to keep the content going until you’re through.
The WordPress Editor is the easiest example, and it comes with a list of blocks you can draw from by clicking the “+” button at the top left corner of the Editor.
After posting each page, we’d recommend that you take advantage of the Yoast plugin before you post the page. It’ll have you add in various search data points, like your focus keyword and meta description, before scoring how well you optimize that content for SEO purposes.
Doing this with every piece of content crafted will help your site rank more highly on Google in the long haul, and prevent you from having to spend costly time doing content edits later.
Before you post, make sure everything is airtight and that you’ve set a featured image that accurately represents the content.
Don't forget categories and tags if you are writing a blog post! You can also set your home page to the page you’ve made by going to “Settings”, then “Reading”, then by clicking “a static page” and selecting the desired page from the list.
Lastly, you can place your site into “maintenance mode” on the Page tab. This stops people from seeing your website and its unfinished state.
Related Read: Wordpress Hide Featured Image
Widgets
Widgets (also found under “Footer”) can be found in the main settings. These are essentially customizable blocks that you can place in various spots on your WordPress site. They’re the sidebars, additional menus, and so on that allow you to customize the accessibility of your site for you and your visitors.
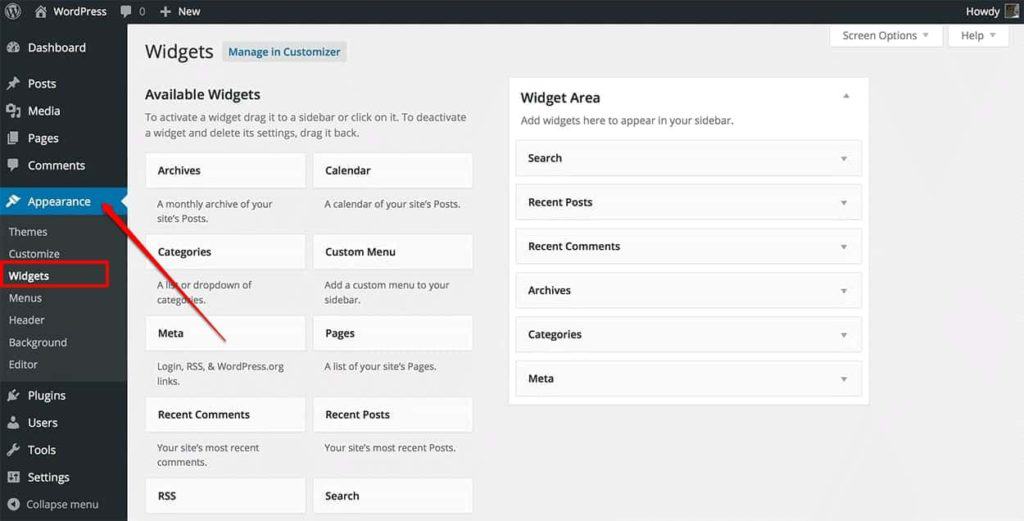
Go to “Appearance”, then “Widgets” to get started. It shows you the available widgets on the left-hand side of the screen, and the right-hand side shows you the places you can “slot” those widgets. Some of these spaces may already be populated but feel free to swap things around as necessary.
You can alter the various features of each widget, including their name and functionality. Or you can use as few of them as you want. It’s up to you!
Menus
We’d recommend saving this part of the process until you have the majority of your content already set up, as you need things to plug into your menus. Go to “Appearance”, then “Menus”.
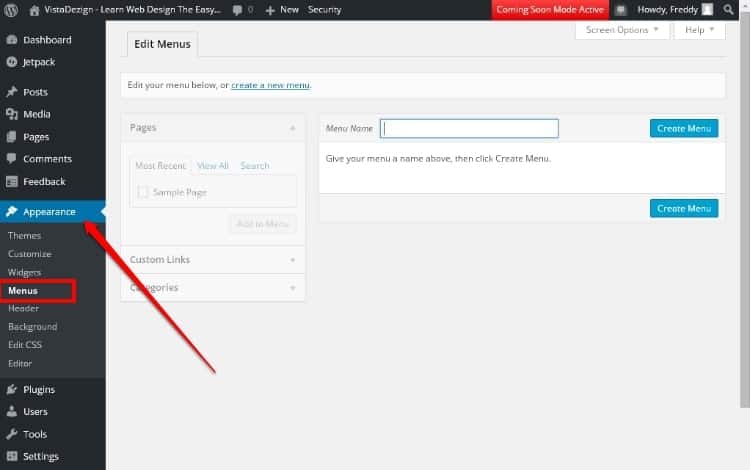
You can create menus from this page, and there’s no limit to how many you can generate. Most sites only use one, of course. You should name the menu something simple; the menu name isn’t displayed anywhere a visitor can see.
After creating the menu, you can determine where you want to go via the options afforded on the “Menu Settings” screen. “Save Menu” when you’re satisfied.
Lastly, keep the section to automatically “add new top-level pages to this menu” unchecked so you can manually place new pages in the menu in the appropriate spot as you generate them.
You can add new pages to the menu by clicking the checkboxes on the left-hand side beneath “add menu items”, then clicking “add to menu”. This also allows you to drag-and-drop menu pages into their appropriate place.
Even better, each menu page can be opened and its settings further customize, including link disabling, column width, and navigation label.
Google Connection
The last piece to your customization puzzle: connecting with Google!
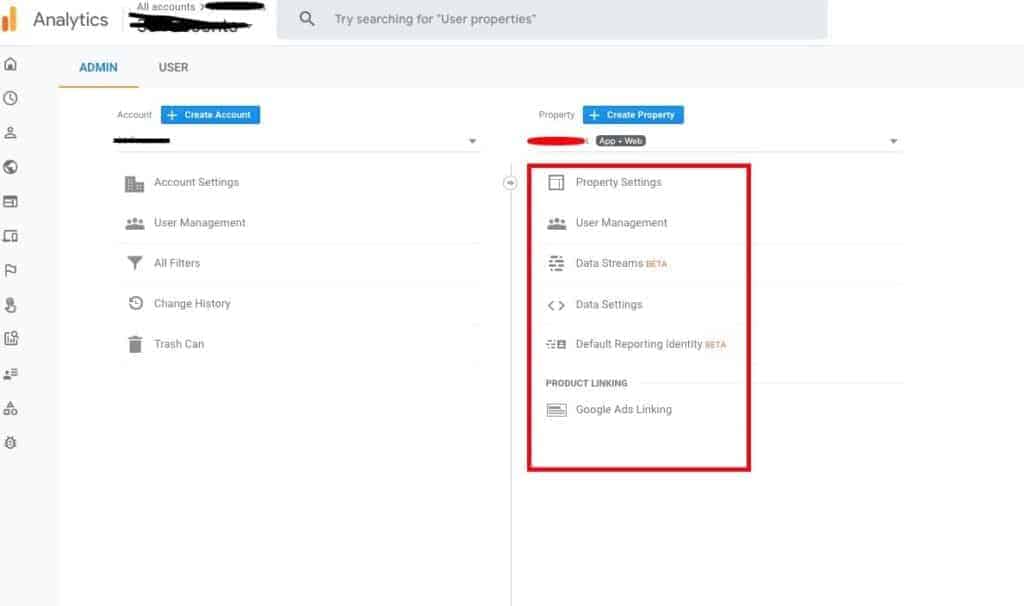
After creating a Google Analytics account and connecting to your website, you can monitor your website’s traffic and other data from the Google Analytics control board. But you can also set up Search Console, which you do by going to the Search Console website and clicking “Start Now”.
The setup process is fairly simple and asks you to verify your ownership of your account. Once verified, Search Console will also gather data on your website, allowing you to supercharge your SEO efforts!
Go to Google Analytics and establish a connection to Search Console as well; do this via “Admin”, then “Property”, then “Property Settings”.
After all this, go to your Yoast SEO settings and click the “Features” tab at the top of the screen. Yoast already creates “sitemaps”, which are data that Google Search Console can use to boost your SEO ranking and generate new data for your tools.
Clicking the “?” above Sitemaps will give you a link that you can then transfer to your Search Console dashboard.
Conclusion
All in all, customizing your WordPress site is a massive endeavor and it’ll likely take you several weeks or months to fully grasp all the functionalities and settings available to tinker with. Follow the above steps, however, and you’ll be well on your way to crafting a functional, effective, and SEO-friendly site you can use as you please!